Getting Started
Dapr Agents Concepts
If you are looking for an introductory overview of Dapr Agents and want to learn more about basic Dapr Agents terminology, we recommend starting with the introduction and concepts sections.Install Dapr CLI
While simple examples in Dapr Agents can be used without the sidecar, the recommended mode is with the Dapr sidecar. To benefit from the full power of Dapr Agents, install the Dapr CLI for running Dapr locally or on Kubernetes for development purposes. For a complete step-by-step guide, follow the Dapr CLI installation page.
Verify the CLI is installed by restarting your terminal/command prompt and running the following:
dapr -h
Initialize Dapr in Local Mode
Note
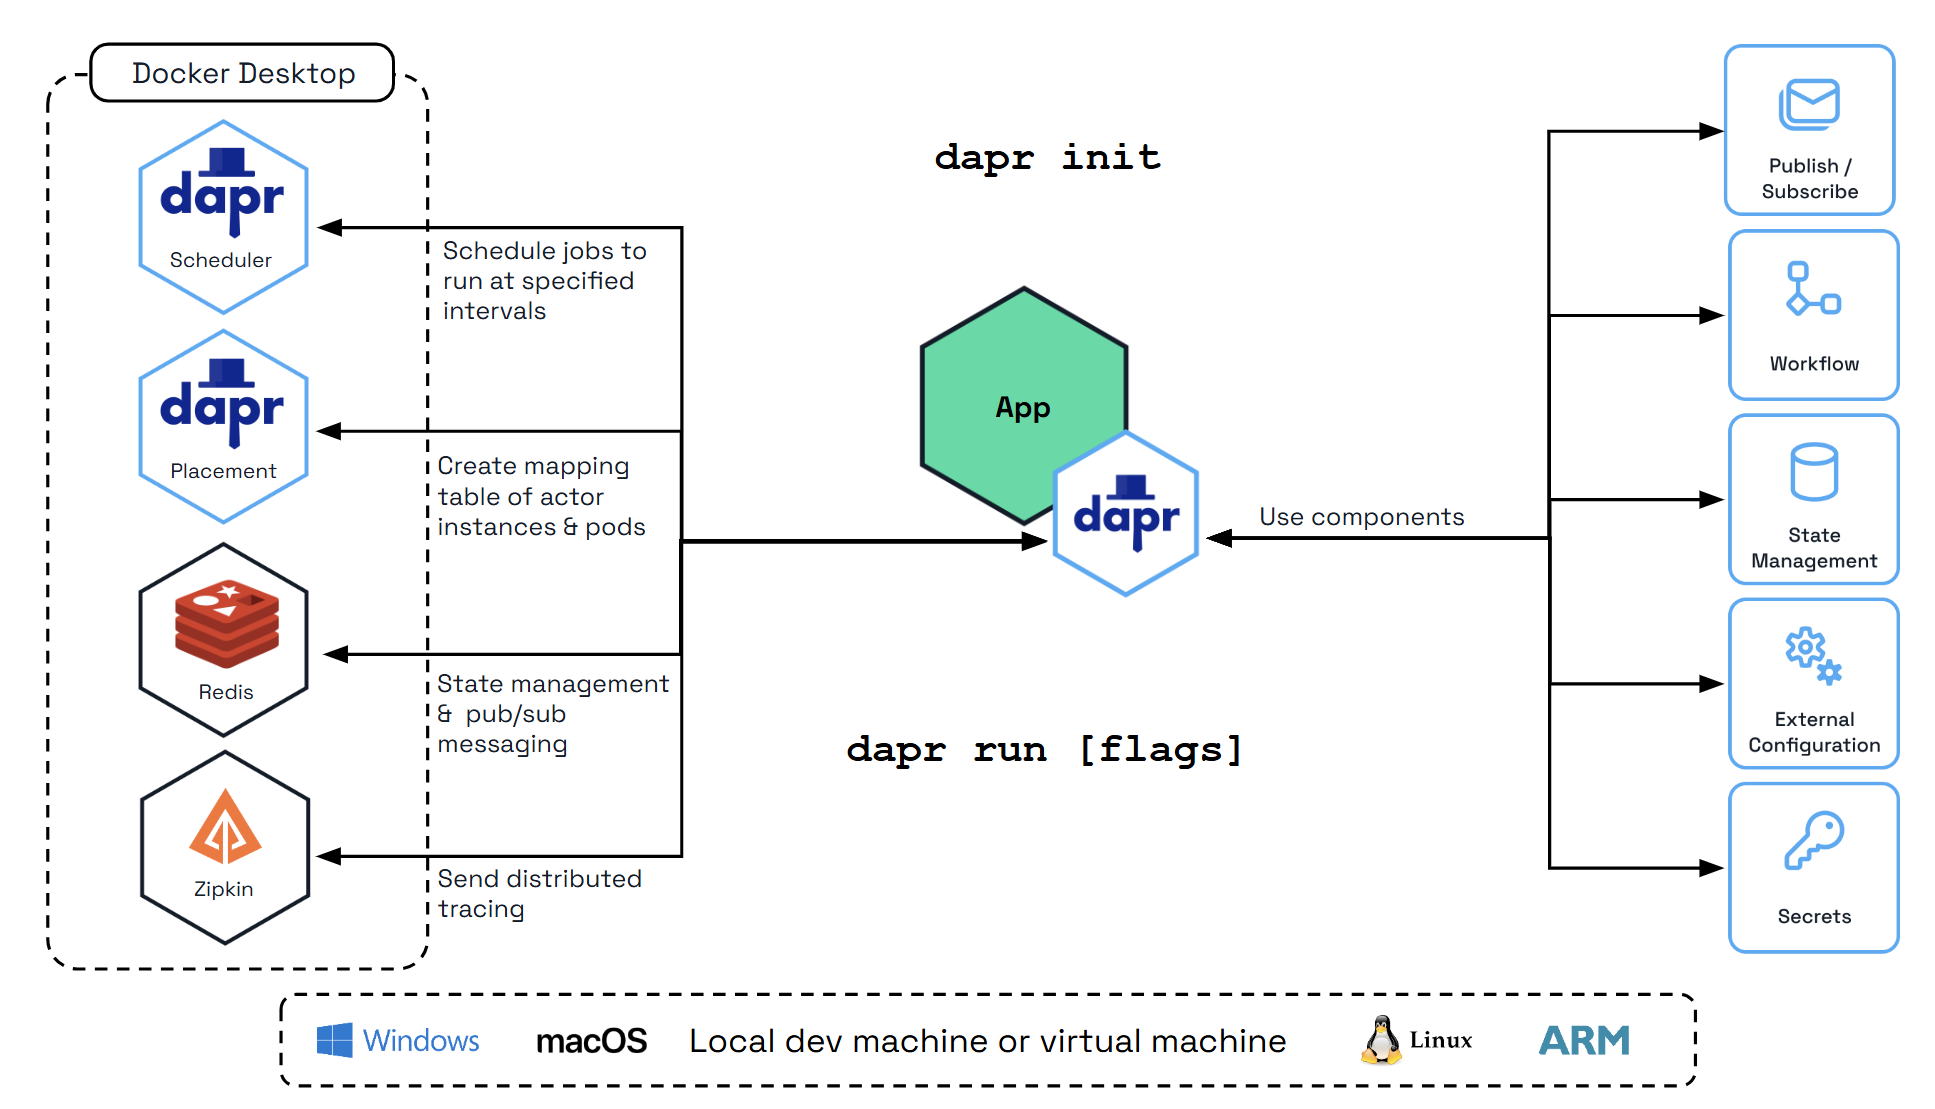
Make sure you have Docker already installed.Initialize Dapr locally to set up a self-hosted environment for development. This process fetches and installs the Dapr sidecar binaries, runs essential services as Docker containers, and prepares a default components folder for your application. For detailed steps, see the official guide on initializing Dapr locally.

To initialize the Dapr control plane containers and create a default configuration file, run:
dapr init
Verify you have container instances with daprio/dapr, openzipkin/zipkin, and redis images running:
docker ps
Install Python
Note
Make sure you have Python already installed.Python >=3.10. For installation instructions, visit the official Python installation guide.Create Your First Dapr Agent
Let’s create a weather assistant agent that demonstrates tool calling with Dapr state management used for conversation memory.
1. Create the environment file
Create a .env file with your OpenAI API key:
OPENAI_API_KEY=your_api_key_here
This API key is essential for agents to communicate with the LLM, as the default LLM client in the agent uses OpenAI’s services. If you don’t have an API key, you can create one here.
2. Create the Dapr component
Create a components directory and add historystore.yaml:
apiVersion: dapr.io/v1alpha1
kind: Component
metadata:
  name: historystore
spec:
  type: state.redis
  version: v1
  metadata:
  - name: redisHost
    value: localhost:6379
  - name: redisPassword
    value: ""
This component will be used to store the conversation history, as LLMs are stateless and every chat interaction needs to send all the previous conversations to maintain context.
3. Create the agent with weather tool
Create weather_agent.py:
import asyncio
from dapr_agents import tool, Agent
from dapr_agents.memory import ConversationDaprStateMemory
from dotenv import load_dotenv

load_dotenv()

@tool
def get_weather() -> str:
    """Get current weather."""
    return "It's 72°F and sunny"

async def main():
    agent = Agent(
        name="WeatherAgent",
        role="Weather Assistant",
        instructions=["Help users with weather information"],
        memory=ConversationDaprStateMemory(store_name="historystore", session_id="hello-world"),
        tools=[get_weather],
    )

    # First interaction
    response1 = await agent.run("Hi! My name is John. What's the weather?")
    print(f"Agent: {response1}")

    # Second interaction - agent should remember the name
    response2 = await agent.run("What's my name?")
    print(f"Agent: {response2}")


if __name__ == "__main__":
    asyncio.run(main())
This code creates an agent with a single weather tool and uses Dapr for memory persistence.
4. Set up virtual environment to install dapr-agent
For the latest version of Dapr Agents, check the PyPI page.
Create a requirements.txt file with the necessary dependencies:
dapr-agents
Create and activate a virtual environment, then install the dependencies:
# Create a virtual environment
python3.10 -m venv .venv

# Activate the virtual environment
# On Windows:
.venv\Scripts\activate
# On macOS/Linux:
source .venv/bin/activate

# Install dependencies
pip install -r requirements.txt
5. Run with Dapr
dapr run --app-id weatheragent --resources-path ./components -- python weather_agent.py
This command starts a Dapr sidecar with the conversation component and launches the agent that communicates with the sidecar for state persistence. Notice how in the agent’s responses, it remembers the user’s name from the first chat interaction, demonstrating the conversation memory in action.
6. Enable Redis Insights (Optional)
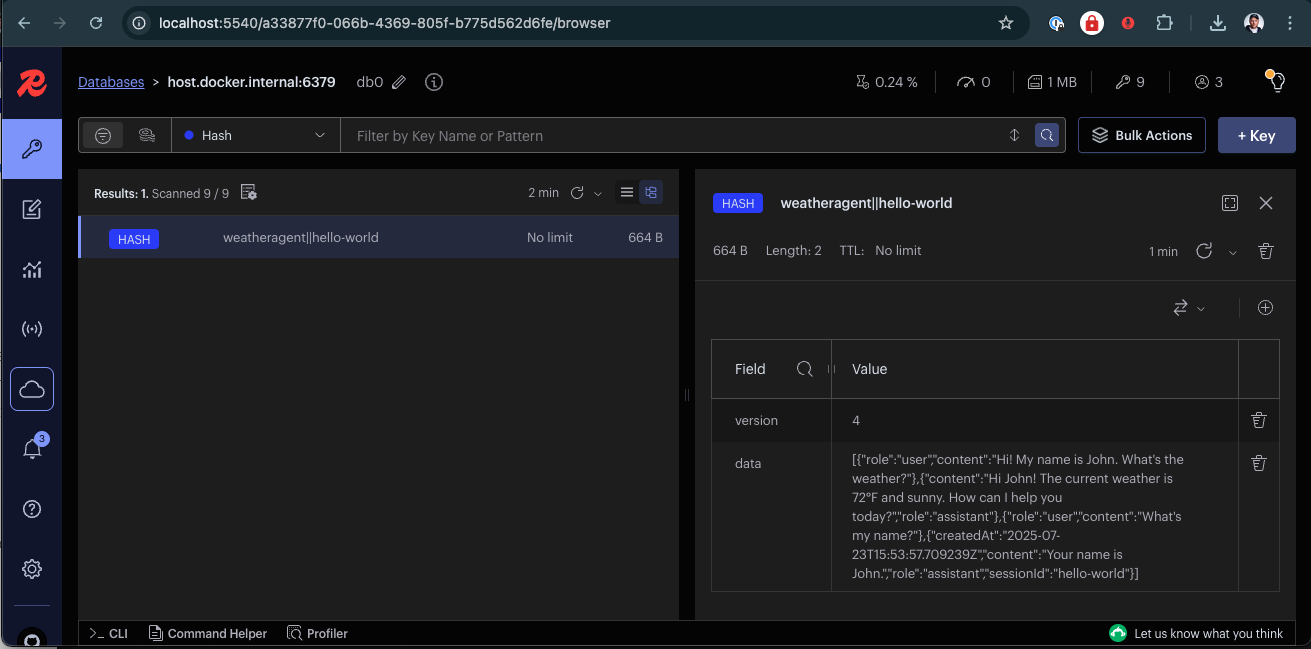
Dapr uses Redis by default for state management and pub/sub messaging, which are fundamental to Dapr Agents’s agentic workflows. To inspect the Redis instance, a great UI tool to use is Redis Insight, and you can use it to inspect the agent memory populated earlier. To run Redis Insights, run:
docker run --rm -d --name redisinsight -p 5540:5540 redis/redisinsight:latest
Once running, access the Redis Insight interface at http://localhost:5540/
Inside Redis Insight, you can connect to a Redis instance, so let’s connect to the one used by the agent:
- Port: 6379
- Host (Linux): 172.17.0.1
- Host (Windows/Mac): host.docker.internal (example
host.docker.internal:6379)
Redis Insight makes it easy to visualize and manage the data powering your agentic workflows, ensuring efficient debugging, monitoring, and optimization.

Here you can browse the state store used in the agent and explore its data.
Next Steps
Now that you have Dapr Agents installed and running, explore more advanced examples and patterns in the quickstarts section to learn about multi-agent workflows, durable agents, and integration with Dapr’s powerful distributed capabilities.